CORONADO MAXSCOPE 40
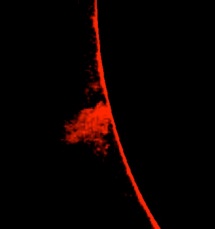
I have enjoyed this telescope more than any scope that I have owned. If you have any interest in solar astronomy, or want to get into it, get one. The only problem that I have had is getting a decent photo. After many photos I decided to use the red channel for the proms and the green channel for the surface, from one over exposed photo, as described below.
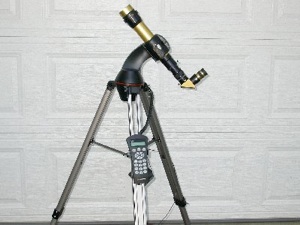
SET UP:
The MaxScope 40 was installed on a Celestron NexStar 60 mount. A Tele Vue Sol-Searcher finder was mounted on the clamshell of the Nexstar, this is a must have, as it greatly reduces the time to get the image into the field of view. A Coronado 18mm Cemax eyepiece for visual observing, and a 24mm Cemax eyepiece for photographic use. A Nikon CoolPix 4500 camera, with Scoptronix adapters, for taking photos. All of the above can be purchased from Anacortes.
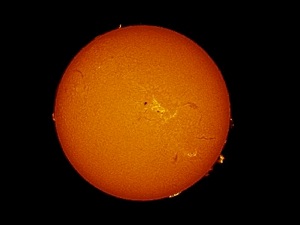
THE BIG PICTURE
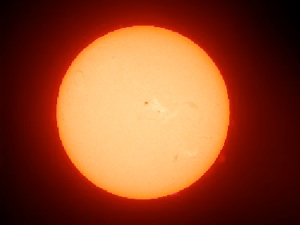
BEFORE
AFTER
CAMERA SETTINGS
Nikon CoolPix4500
2003/07/03 13:14
TIFF-RGB(8-bit)
Image Size: 2272 x 1704
Color
Converter lens: none
Focal Length: 28.9
Exposure Mode: Shutter Priority
Metering Mode: Multi-Pattern
1/30 sec- f/9.7
Exposure Comp: 0 EV
Sensitivity: ISO 100
White Balance: Auto
AF Mode: AF-S
Tone Comp: Normal
Flash Sync Mode: Not Attached
COMPUTER PROCESSING OF IMAGE
Paint Shop Pro 7 was used to process this image.
1. File-Open-(select image)-Open
2. Select image
3. Colors-Split Channel-Split to RGB
4. Close Blue background-Do not save
5. Select red Background
6. Colors-Adjust-Brightness/contrast-(set Brightness -50/ Contrast +50)-OK
7. Effects-Sharpen-Unsharp mask-( Radius 30/Strength 100/Clipping 0)-OK
8. Colors-Adjust-Highlight/Midtone/Shadow-(Shadow 50/Midtone 50/Highlight 80)-OK
9. Colors-Combine Channel-Combine from RGB-(Make all Three channels the redsource)-OK
10. Select Green background.
11. Effects-Sharpen-Unsharp Mask-(Radius 5/Strength 200/Clipping 0)-OK
12. Colors-Combine Channel-Combine from RGB-(Make all three channels the greensource)-ok
13. Select the green combined image.
14. On the Green combined image click the magic wand, from the tool bar on the left, on the dark background outside of the solar disk.
15. Selections-Invert
16. Edit-Copy
17. Select the Red combined image.
18. Image-Resize-Click Percentage of original-(width 99/ Height 99)-OK
19. Edit-Paste-As new layer
20. Align the solar disk with the prom background.
21. Layers-Merge-Merge all
22. Colors-Adjust-Levels-(Input Levels, RGB as is, Red as is, Green center slider move to .25, too the right, Blue left and center slider move all the way to the right)-OK